Adventures in Canned Venison
With the Covid-19 plague keeping the Shamanic Dream Team sidelined, I decided to do something to get my mind occupied. There was a back-burner project that seemed appropriate for the situation. One never knows how far things are going to slip before the “S” hits the “F.” From my writing, you know I’m not a big prepper type, but when you’ve got a 200-acre BOL just laying around, I guy like me tends to ponder such things.
Time to can some venison!
The genesis of this idea came about just at the end of winter. I got on Amazon and ordered up a pressure canner and some Mason jars. KYHillChick and I did some heavy research. Here’s one of the sites:
Simply Canning– Canned Venison
In general, this is what I’ve learned:
1) You need to pressure can. Hot water canning does not work. Botulism is a very real possibility.
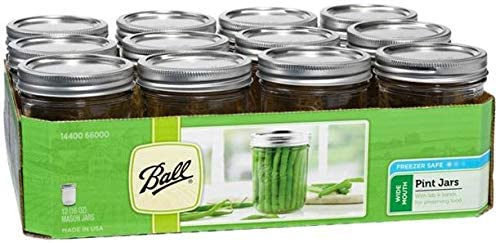
2) 1-pint wide-mouthed mason jars are a good starter. A lot of places say 1-Quart, but the result is that about a pound of venison goes in a pint jar. That is a perfect meal size for 2 people. The trick is to keep the mouth clean and doesn’t do any shortcuts on heat and time. I did my first batch for 90 full minutes at 15 PSI. It took hours to get up to that temp. It took all night for the temp to come back down. That’s okay. That’s what you need.
3) Be immaculate. You’re canning raw meat. The jars and lids and utensils all simmered for a half-hour in nearly-boiling water before use. I used utensils instead of my hands.
4) It’s hard work. Cubing all that venison left me worn out. The whole job took 12 hours to do 16 jars.
5) Read the pressure canner’s instructions. Read as many articles online as it takes to be familiar with the process. Be prepared ahead of time. I went as far as giving the pressure canner a trial run with just water. I went 30 minutes with the canner at the recommended 15 PSI. It helped me understand the workings of the system and let me know what to expect when I was doing the actual processing.
Now to the specifics:
Click on the pictures and it’ll take you to the link at Amazon.
Here is the canner I ordered from Amazon:
Here are the Mason jars: I ordered 2 cases of 12 each.
Here are the accessories I ordered:
I also ordered this salt: half of the 15 oz bag did 24 pints

Redmond Real Salt – Ancient Unrefined Mineral Powdered Sea Salt Pouch for Cooking, Baking, Canning, Baths, Neti Pots, and Other Medical Uses
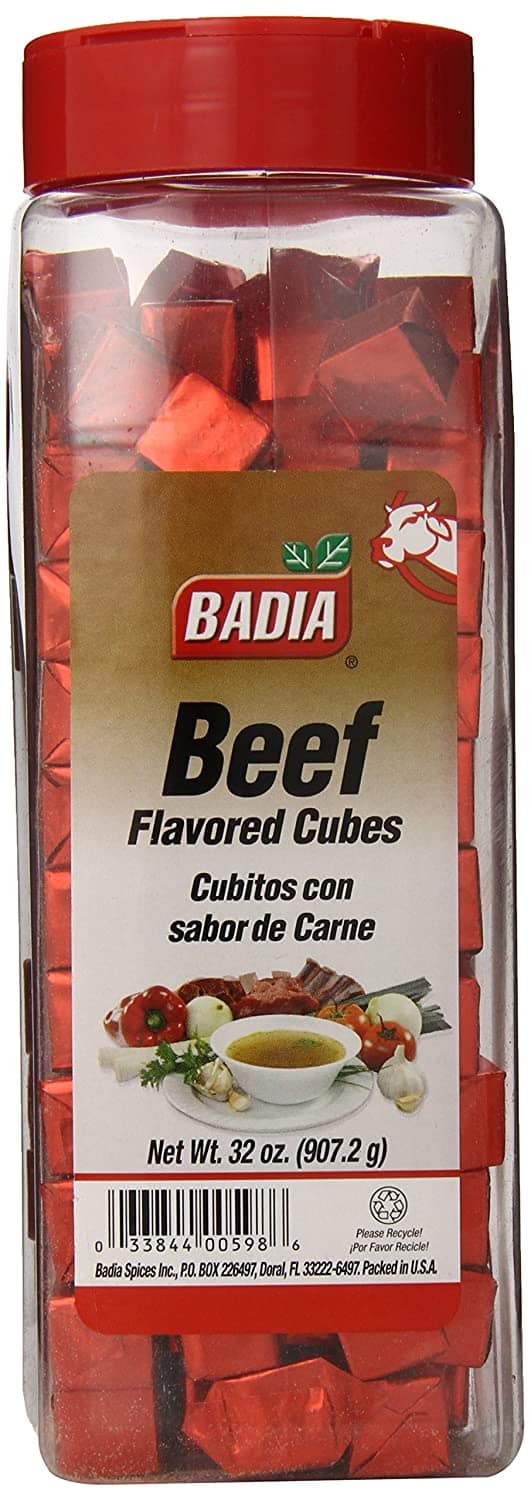
. . . and a big canister of beef bullion cubes:
Prior to the big day, I ran everything through the dishwasher.
The Process
Once everything was assembled, I pulled 12 lbs of venison steak and another 7 lbs of grind out of the freezer and put them on metal trays to thaw. They were out of the freezer by 0900 and ready for processing beginning at 1300.
After lunch, the meat was ready for slicing. You want the steak or roast to be still partially frozen to aid in the cubing process. I had 3 knives– two slicers and a chopper. The latter is used when you’re whacking through a large chunk of semi-frozen meat. The slicing blades are better for removing bone, silver skin, and fat. With the 10 lbs, I filled two 1-Gallon containers and produced 2-3 lbs of scrap that went into the pot. I cooked the pot for an hour and then let it cool. Jay, the collie will eat well for days off that. Normally, I mix the broth with rice and mix that in as well.
See: Venison for the Dogs for a complete description.
Having a dog around is an essential part of all this. You will see from the pictures that Jay-Dog volunteered to keep the floor squeaky clean. He was excited from the moment I got up yesterday morning; I told him over coffee that his dead deer delights were on the way. He spent the latter half of the morning patiently examining the venison while it was still thawing in the wrappers and bounding about the house as though he could not wait for the blessed event to begin. Processing large amounts of venison is, for a dog, an event that goes far beyond human concepts of Christmas, Thanksgiving, Saint Hubert’s Day, and the SuperBowl.
By 1500, the slicing was done, and the loading began. While I took breaks in the process, I got my mother’s hot-water canner and another stew pot out. In the former, I placed the jars. in the latter, I put the utensils, the lids, and the rings. I covered everything with water on the stove and brought the temperature up just below boiling. By this time KYHillChick and Angus were involved. Honestly, I did not know how extensive this job would be. My only memory of canning was watching my mother and grandmother can back in the mid-60’s. The first time through was a bit overwhelming, but we bulled on through and the second batch I ran this morning was quite easily done while the rest of the house slept. Poor Jay-Dog didn’t even make it up; the excitement of the previous day had left him thoroughly fagged-out.
By 1700, we had 16 jars filled with the 10 lbs of venison cubes. A few at a time, we had removed the jars from the simmering water bath along with a supply of lids and rings. The accessories include tongs for this as well as a magnet-on-a-stick for picking up lids and rings. The way I filled the jars was to take a clean jar place the funnel on (see the accessories) and spoon venison in. There’s a spatula included and this was was handy. It takes a bit of doing to tamp the venison down. I’d spoon and tamp and spoon and tamp. When the jar was filled within one inch of the top, I added a teaspoon of salt and one beef bouillon cube. There is one last step before capping-off. I took a paper towel soaked with white vinegar and wiped off the top of the jar. This removes the very last of any residue (oil, meat, whatever) and sanitizes the top. Just so you know, I used one paper towel and there were still no marks on it when I was all done. I then handed the jar off to KYHillChick who placed a lid and then a ring onto the top. She hand-tightened the lid. You don’t have to do a crush-fit, just enough to seal the top. There is a point in the process where the steam and heat drive air out of the jar; this is necessary. You could tell it worked because there was a definite smell of beef bullion while the canner was in operation.
The Presto 23-quart canner takes two rows of 8 pint jars each. You need a rack at the bottom to hold the jars from direct contact with the bottom of the pot. You need a second one between the layers of jars. I had a circular wire rack that came with our air-fryer. It worked fine for the bottom, and then the rack that came with the Presto canner fit between the two levels. It took over an hour to get the 24 jars filled, capped, and placed in the pressure canner.
Then came the heating. We have the old style double-oven range. The overhanging top oven sat too low to put the pressure canner on the stovetop, so I enlisted an 1100 Watt hotplate and did everything on the kitchen counter. 1100 Watts works, but 1500 Watts would have been better. It takes for-freakin’-ever to bring things up to the proper pressure of 15 PSI. That’s not a bad thing. The venison gets a pretty thorough cooking along the way. I also did not mind the fact that the hotplate kept the pressure cooker just a hair over the 15 PSI when set to MAX heat. You just don’t want it to fall below 15 PSI. After a couple of hours, we finally got the telltale dancing of the regulator. I set a timer for 90 minutes. I finally was able to pull the plug at 2045. Be patient. Do not drop the pressure right away. I just let it sit as-is and went to bed. I woke up this morning and the jars was still warm, but all of them were sealed.
After breakfast and a couple of cups of coffee, I got to work again on the ground venison. It took me about an hour to get everything set up and the jars filled. It has taken an hour to get the cooker up to temp and now I’m on the 90-minute timer. One tip I will give you: on the first batch, I used the 3 quarts of water from the jars’ water bath to fill the bottom of the pressure canner. It was just at boiling when I did. That saved time bringing the system up to pressure. This morning, I set the hotplate to about mid-way and pre-heated the water while I was filling the jars. It was close to bubbling before the jars went in. All told, the first batch consumed about a quart of water as steam. There was just a hair over 2 quarts of 3 left when I emptied it this morning. You cannot let the system go dry. 2 out of 3 quarts were more than enough.
Folks say venison needs to cook 75-90 minutes. I went for the max, and I am happy with the results.
This post has already been read 4307 times!
Views: 4






Comments
Adventures in Canned Venison — No Comments
HTML tags allowed in your comment: <a href="" title=""> <abbr title=""> <acronym title=""> <b> <blockquote cite=""> <cite> <code> <del datetime=""> <em> <i> <q cite=""> <s> <strike> <strong>