Shamanic Wind Flags
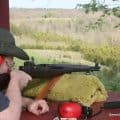
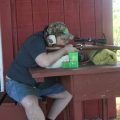
It is coming up on the 19th anniversary of our first trip to the farm. One of the first things I remember from those early days was the cool breeze that always seemed to be blowing up on the front porch. It seemed like no matter how hot and muggy it was, there was always enough wind that, given the shade of the old Catalpa tree and a little bit of patience, I could always cool off. The dark side of this came after I started using the front porch to sight in my deer rifles. There is always wind, especially in the afternoon, and it blows in all kinds of screwy ways.
The front porch is great for a variety of reasons. I can easily see 4 counties from it. I can see storms that are down near the Tenessee border at times. There is nothing between me and Saint Louis but the curvature of the Earth. For a lot of things, my front porch can’t be beaten. As a place to shoot a rifle, it can suck.
I’ve made some concessions to the wind over the years. The biggest one was constructing a second 100-yard target stand that runs roughly East/West from the porch. This, coupled with the original North/South range takes care of most situations. If the crosswinds are too much going one direction, I just twist 90 degrees and shoot the other direction. I’m starting to get to the point, however, where I need to exert more subtlety. For this, I need to read the wind.
To this end, I asked my online friends and others about wind flags. After studying things for a bit, I realized this was going to doing. A professional flag was going to run me $50. However, I figured I could replicate it for a lot cheaper.
The Stands
It helps to have a good sturdy stand to start with. It needs to be adjustable. Somebody suggested music stands. eBay had cheap music stands for $7 apiece. I bought 4.
The Flags
Some guys use pinwheels. Some people use streamers. I opted for the wind vane concept. The key to a good wind vane-style flag
1) Responsive. If there is a tiny flutter, you need to see it. For a this you need a large surface area. You also don’t want the flags constantly turning circles. The tail, therefore should be as large as possible.
2) Visible. I used fluorescent orange on one side and green on the other. I painted the front tip black and the rest white. This makes it easy to see what the flag is saying. I added a florescent streamer to indicate wind speed. I painted black arrows on the tails just as a reminder of which way the wind was actually blowing.
3) Unstable, or nearly so. You want this sucker to turn in the slightest wind and do so quickly. I heard that putting the balance point in the front third of the length does this.
Budget
A single benchrester’s flag from a reputable source was $54 and would take 4 weeks to deliver. I figured I could do better than that. The biggest expense was the music stands (4 for $7 on Ebay with free shipping) I got delivery in a few days. The rest was all wood scraps and about $10 worth of spray paint. I still have half a can of everything left.
Construction
I started with 1/4 of a standard yard sign (one of those BLM yard signs does really well). They’re made of Coroplast, corrugated plastic. It is lightweight and strong. I had some 3/8″ plywood that I ripped into half-inch strips and then chewed a 6-inch notch in one end to fit the coroplast. I used Liquid Nails construction adhesive for glue. After that was dry, I sawed up six-inch sections of the plywood and began gluing them around the tip with wood glue. This built up the end so I had a counterweight at the end.
Once everything had set and dried, I did two coats of Flo Orange and Flo-Green on the tail, and then White for the body and Black for the tip.
For the pivot point, I had to first figure out how to mount this all on the music stand. The music holder was attached to the stand upright with a bracket, and this bracket was rivetted on. I simply drilled out the rivets. I cut square sections from a piece of scrap 2X2. In the center, I drilled a hole for a super-long finishing nail. Once the nail was inserted all the way through and was stick up better than 2 inches, I used wood screws to screw the bracket over the bottom of the 2X2X2 block.
Onto the finishing nail, I used a 2″ section of broomstick. I drilled a center hole about an inch deep in one end. With a spot of grease for lube, I had a perfect pivot joint. The other end of the broomstick, I notched to hold the 3/8″ plywood.
This is not a 1-hour project. 4 flags took 2 weekends to make, but most of the time was spent waiting for glue and paint to dry.
The last thing I did was drill out some holes in the bottom of each counterweight and added some spare lead 44 Mag bullets. I just shot Liquid Nails in the holes and stuck the bullets in. This fine-tuned the balance.
I’ve got a pretty well-stocked shop in the basement. I used the bench saw to rip the plywood, a drill press, and a bunch of gluing clamps. A passable flag could probably be made out of the metal parts of a yard sign. One fellow said he had seen a benchrester win a competition using a wind flag made out of a drink cup, a baggie, and a coat hanger. This isn’t rocket science.
Use
The first flag should be placed as close to the muzzle as possible. A lot of shooters believe it is the first flag that says the most about how the wind will influence your shots. Another should be placed close to the target and then the other two should be placed between the other two at reasonable intervals. If everything is done right, you should be able to see the flags in the scope without them obstructing your view of the target.
I’m not an expert on how to use wind flags. I’m just starting. What I do know is that wind can play hell with a group, and the best way to work things is to watch the flags and take your shots when either there is a minimum of wind across the path of the bullet, or when the patterns you see in the flags are consistent.
I want to thank all the rifle loonies on the 24hourcampfire.com for their guidance.
This post has already been read 551 times!
Views: 8

Pingback:Escape from Planet 4 MOA– Part 3 – Genesis9:2-4 Ministries