The Shamanic MK I
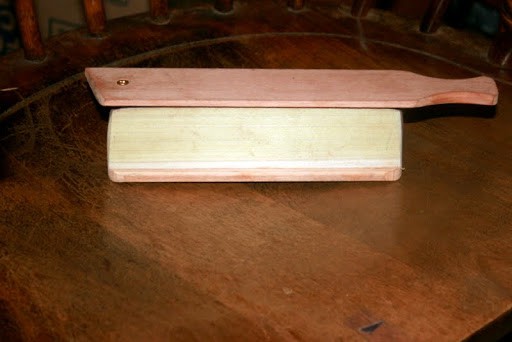
I’m not saying it’s a work of art, but I pulled it off. Allow me to introduce you to the Shamanic MK I
It is a poplar over cherry with walnut ends and a cherry bottom. The goal was just to make something that vaguely sounds turkey-like. What I got was a deep raspy call with a lots of volume. Frankly, I’m leaving puddles, I’m so happy with it– not because of the tone, but that I got any tone at all. This was my first project of this level since 8th Grade Shop, and I came up out of the basement with all my fingers.
This project is a milestone in a very long journey. As you may remember, I was starting to make calls clear back in 2006, and by 2008, I was contemplating doing a box call. Then I got the call from Brian Warner of Heirloom, and the next thing I knew, I was pro-staffing for a call company. There was no sense messing with box calls on my own at that point.
Then a lot of stuff happened.
Years later, I found myself in a different house. I started setting up a workshop, and in the back of my head was this idea of producing box calls. Over the past two years, I have been assembling the bits and pieces. I was in no big rush.
Bench saw: I had a big old cast iron behemoth already. It had been sitting idle for almost a decade in the garage going largely unused. If I had to do it over again, I would buy one that allowed the rip fence to be on either side of the blade. Mine is a 3 HP monster, and really what’s required here is precision over power.
Drill press: Nothing fancy. I had a 10-inch Craftsman. You want one that will adjust down to low. RPM . 600 RPM works well with a Forster Bit for excavating out the middle of a solid box.
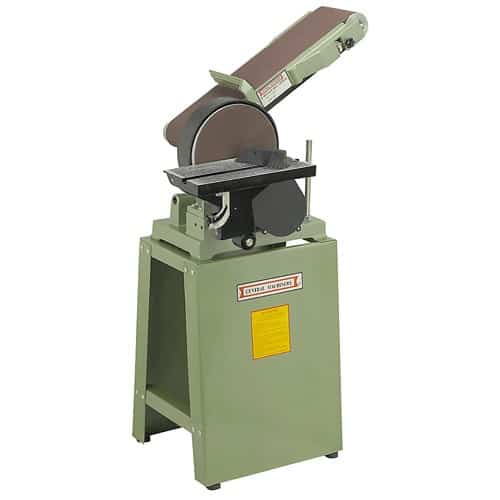
Combination Sander: I went into Harbor Freight to get the little 4″ table model on sale, and they were out. The manager offered the big floor-standing 6 inch for the same price. I grabbed it and left before her medication wore off.
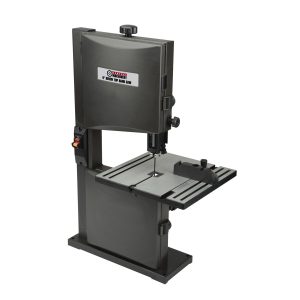
Band Saw: Again, a Harbor Freight sales flyer led me astray.
What I can say is that the trick I found was to watch Harbor Freight sales flyers and snatch up the pieces as needed. Turkey calls are not all that demanding, and over the course of the year you can catch all this stuff on deep markdown.
So far so good. That was over the summer. Deer Season intervened. You know that story. It was now after Thanksgiving. The deer were all nestled all snug in the freezer. I went to Shipley’s and purchased a bunch of blanks and such as well as a kit that promised all the fixings for 4 box calls.
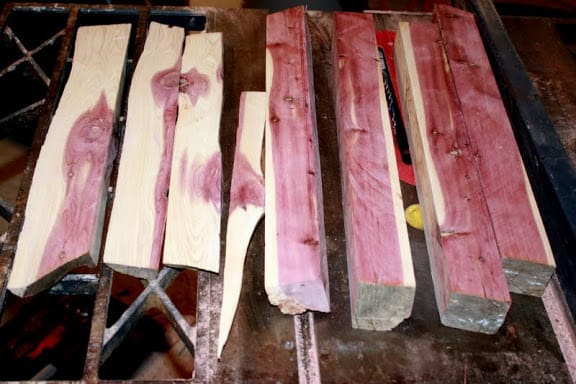
On my last trip out to Campground this year, I snagged a cedar log that had been laying near the base of the ladder since 2008. I was just curious as to what was inside. My first project in the new workshop was cutting this log down with the idea that if there was usable wood, it would mean a limitless supply of Eastern Red Cedar was in my grasp. It took the better part of a whole weekend, but I got four 2″X2″X24″ blanks as well as several other odd slabs that could be worked into paddles.
Now that I had tools and stock, it was time to actually make a box, but I really did not have an idea what I wanted to build. The general view was that a beginning call maker would make half a dozen calls that were complete failures before getting a sound out of one. I did a bunch of research. I found a couple good tutorials online– one for a solid box and another for a glue-up.
I figured it would be easier to do the glue-up box first, since I had pre-made fixings at hand. That left the dimensions and material to decide. There are hints out there for what make a good box call. The truth is the really good call makers do not cough up their secrets completely. There is a lot left to be determined through personal trial and error.
My goal was not to make a museum piece. I wanted to get to the fastest, easiest call to make that would produce a sound. It took a while to find out what that was. Inlays, checkering, and all that are purely aesthetic. Gone. Routed grooves on the outside faces of the soundboard do have a practical purpose. They can raise the pitch, but they are not necessary. Material choice is important, but common stuff like walnut, cherry, poplar and cedar make a great call. When a block of the exotic stuff is $12, it is good to start off using the $2-3 stuff. It was time to go to the empirical evidence for the rest of the info.
My box call inventory goes back to a Quaker Boy Grand Old Master that Dick Kirby put in my hand back in the early 80’s. Back then, I was just a schlump out looking for a turkey call and a box of ammo. I had not yet been turkey hunting. It took 30 years for me to figure out I had been talking to The Man Himself.
I grabbed a turkey roasting pan from the pantry and started filling it with calls. I went to the kitchen table and started in with a ruler and caliper determined to figure out what dimensions were ideal. I quickly discovered something: they were all basically the same call. All but one was within 1/4 ” of 7.75″ long and all had about 1/4″ difference in the top radius going from the end to the middle. One had perpendicular sides, but all had nearly the same opening, regardless of the angle. Solid, glue-up, cheap, expensive, one-off customs, and production models– it was all the same call! Was that just me or what? Who came up with that design originally? These are all questions that will have to be researched later. I came away from the kitchen table with fair idea of what the first call would be. I did not know enough to be innovative. The goal here was to make something that worked.
The shamanic MK I would start out as a 7 7/8″ call with a cherry base and cherry lid, walnut ends and poplar sides. The choice of woods was completely prosaic. They had come with the kit from Shipley’s. They were common and cheap choices. If I boogered something, it was not going to be an expensive failure. The length was on the top end of what I had measured, but I figured that would give me some slack if I screwed up with the sander.
Here are the instructions I used:
and while we are on the subject, here are really good instructions for a solid box that I have yet to attempt:
Cut out all the frills, and you have what I am going to try soon. For now, I just wanted to do a standard glue-up box.
Overall, construction was remarkably easy. Having the large sander turned out to be a godsend. The material is soft enough that you can cut well off the line and then sand your way to perfection. I sanded all surfaces that would end up getting finished down to 220 grit with a sheet of sandpaper on a table before assembly. The fitting of the end blocks took time, but having a tight fit was important.
I used Gorilla Wood Glue, because that was what was at hand. Titebond II is another good choice. and made sure everything was clamped solidly, and then wiped all the glue that I could off with a wet towel. You want to be careful as wood glue cannot be stained, and it plugs up the pores of the wood. You also want a solid connection that holds the sound boards tightly. A sloppy bond with voids will kill the sound.
My one “ooops” was with the paddle. I cut the thing just a hair too short. I put it aside. I’ll make my next call only 7.5 inches long and it will do just fine. I just grabbed another paddle and left it the full 12 inches long, figuring I would cut it off to just the right length before final assembly.
The top radius of the box was a big concern to me going in. The principal of a box call is that the radius of the paddle and the top radius of the sound boards create a minimal point of contact. I had tried to really burrow in on dynamics were at work. What I found out was if there was about a 1/4″ difference between the middle and the top and bottom, there would be a good chance of success. The radius shape did not have to be symmetrical front to back, but the two sides should be fairly close in shape. I therefore made a template out of scrap oak and sanded down close to the scribe line. The ends and such were not quite even when they went into the clamps, I figured the sander would sort those things out when the glue dried. I was right.
I got everything glued up and clamped and then went upstairs for an early lunch and an afternoon gorging on football. I would have let the glue set until next weekend, but Green Bay was getting pummeled and as a Bengals fan I could not bear to watch Carson Palmer delivering the beating. Besides, any day the Steelers and the Browns lose is a good day, right? Perhaps it was a portent. I went back down and finished the job.
Within an hour, I had everything shaped and sanded, and the paddle drilled and screwed down. It was now time for tuning. I had gone over the working surface of the padde with 100 grit, and did the same as a quick once-over on the top radii. I tried to yelp. Miraculously, I got a sound. I messed with the screw and found that I had found the sweet spot purely by accident. I did some cursory sanding with 100 grit on the inside edges of the top radii. When they say it does not take much sanding to change the tone of a box, they are right. I returned the screw it to its original setting and chalked it up. It clucked, yelped and purred. In fact I’ve never seen an easier box for purring. Overall, it was a deep, raspy tone. I may try and take off a wee bit more off the back portion of the radii in order to enhance the rollover. Right now, I’m chicken.
Although it was by no means the best call I had ever picked up, The MK I was well within reason, and certainly something I would consider carrying to the field.
This post has already been read 485 times!
Views: 4



Comments
The Shamanic MK I — No Comments
HTML tags allowed in your comment: <a href="" title=""> <abbr title=""> <acronym title=""> <b> <blockquote cite=""> <cite> <code> <del datetime=""> <em> <i> <q cite=""> <s> <strike> <strong>